一、创建一个能跑的起来的Web API项目
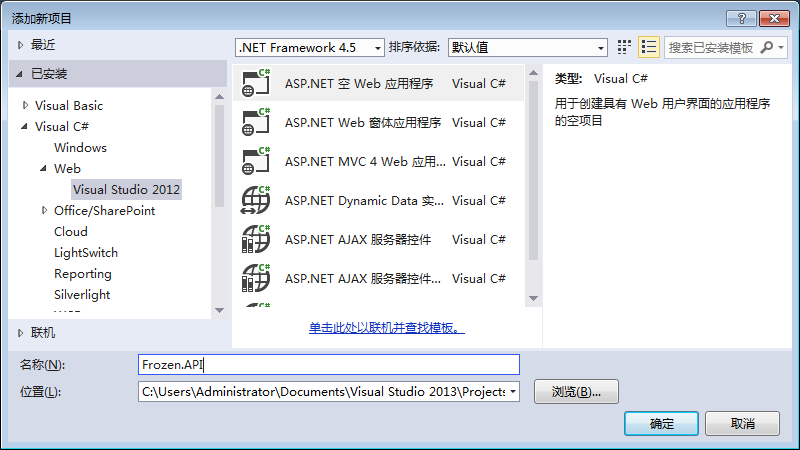
1、建一个空的 ASP.NET Web应用
(为什么不直接添加一个Web API项目呢,那样会有些多余的内容(如js、css、Areas等),项目首先就需要清理一次。这样一步步来也更易于理解API项目)
2、用NuGet引入Web API

这时我的packages
<?xml version="1.0" encoding="utf-8"?>
<packages>
  <package id="Microsoft.AspNet.Cors" version="5.2.3" targetFramework="net45" />
  <package id="Microsoft.AspNet.WebApi" version="5.2.3" targetFramework="net45" />
  <package id="Microsoft.AspNet.WebApi.Client" version="5.2.3" targetFramework="net45" />
  <package id="Microsoft.AspNet.WebApi.Core" version="5.2.3" targetFramework="net45" />
  <package id="Microsoft.AspNet.WebApi.Cors" version="5.2.3" targetFramework="net45" />
  <package id="Microsoft.AspNet.WebApi.WebHost" version="5.2.3" targetFramework="net45" />
  <package id="Newtonsoft.Json" version="6.0.8" targetFramework="net45" />
</packages>
3、App_Start下创建一个WebApiConfig.cs类,作为api启动配置类
代码如下
using System.Web.Http;
using System.Web.Http.Cors;

namespace Frozen.API
{
    public class WebApiConfig
    {
        public static void Register(HttpConfiguration config)
        {
            //启用跨域
            var cors = new EnableCorsAttribute("*", "*", "*");
            config.EnableCors(cors);

            // Web API routes
            config.MapHttpAttributeRoutes();

            config.Routes.MapHttpRoute(
                name: "DefaultApi",
                routeTemplate: "api/{controller}/{id}",
                defaults: new { id = RouteParameter.Optional }
            );
        }
    }
}
4、添加“全局应用程序类” Global.asax
Application_Start方法如下
        protected void Application_Start(object sender, EventArgs e)
        {
            GlobalConfiguration.Configure(WebApiConfig.Register);
        }
5、添加一个Web API控制器类,比如”StudentController“
初始代码如下(常用的还有个Patch方法)
using System;
using System.Collections.Generic;
using System.Linq;
using System.Net;
using System.Net.Http;
using System.Web.Http;

namespace Frozen.API.Controllers
{
    public class StudentController : ApiController
    {
        // GET api/<controller>
        public IEnumerable<string> Get()
        {
            return new string[] { "value1", "value2" };
        }

        // GET api/<controller>/5
        public string Get(int id)
        {
            return "value";
        }

        // POST api/<controller>
        public void Post([FromBody]string value)
        {
        }

        // PUT api/<controller>/5
        public void Put(int id, [FromBody]string value)
        {
        }

        // DELETE api/<controller>/5
        public void Delete(int id)
        {
        }
    }
}
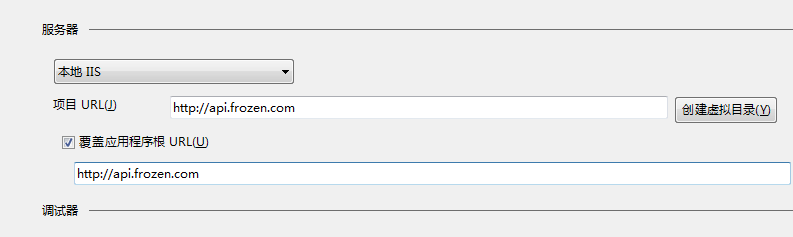
6、绑定下测试域名
还得在hosts做下指向
7、感觉可以跑起来了。启动程序,直接报了500,错误提示是”由于权限不足而无法读取配置文件“
权限问题,解决方案文件夹,右键属性,安全选项卡,添加‘Everyone’,将‘修改’权限打开,解决问题
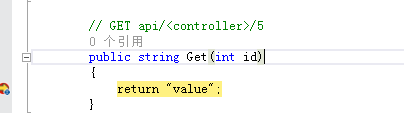
8、提前在‘public string Get(int id)’处加好断点,在浏览器输入‘http://api.frozen.com/api/student/1’
命中断点,说明这已经是一个可以跑起来的API项目了
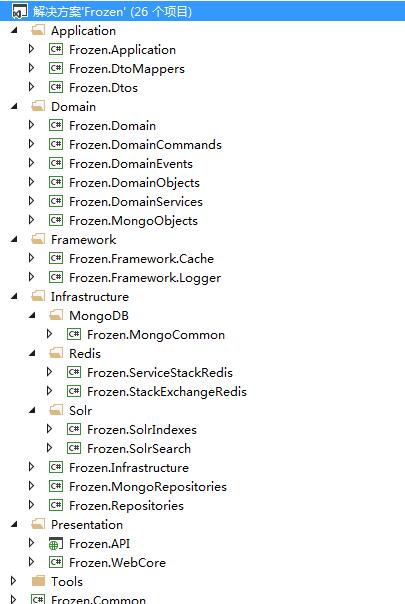
二、搭建框架
1、按ABP,被我搭建成了这样。这张图后续会根据项目实际情况,或个人现阶段的理论误区,持续更新
(其实还应该有张架构图,但由于线条交错,看起来效果不怎么样,所以没贴出来)
2、注册Autofac
从NuGet安装Autofac,关键代码如下:

        public static void SetAutofacContainer()
        {
            var builder = new ContainerBuilder();
            builder.RegisterApiControllers(Assembly.GetExecutingAssembly());
            builder.RegisterType<InMemoryCache>().As<ICache>().InstancePerLifetimeScope();
            builder.RegisterAssemblyTypes(typeof(StuEducationRepo).Assembly)
                .Where(t => t.Name.EndsWith("Repo"))
                .AsImplementedInterfaces().InstancePerLifetimeScope();
            builder.RegisterAssemblyTypes(typeof(StudentRegisterDmnService).Assembly)
                .Where(t => t.Name.EndsWith("DmnService"))
                .AsImplementedInterfaces().InstancePerLifetimeScope();
            builder.RegisterAssemblyTypes(typeof(StuEducationAppService).Assembly)
                .Where(t => t.Name.EndsWith("AppService"))
                .AsImplementedInterfaces().InstancePerLifetimeScope();

            builder.RegisterWebApiFilterProvider(GlobalConfiguration.Configuration);
            IContainer container = builder.Build();
            var resolver = new AutofacWebApiDependencyResolver(container);

            // Configure Web API with the dependency resolver.
            GlobalConfiguration.Configuration.DependencyResolver = resolver;
        }
3、注册AutoMapper
从NuGet安装AutoMapper,关键代码如下:
     Mapper.Initialize(x =>
            {
                x.AddProfile<DomainToDtoProfile>();
                x.AddProfile<DtoToDomainProfile>();
            });
public class DomainToDtoProfile : Profile
{
public override string ProfileName
{
get { return "DomainToDtoMappings"; }
}
protected override void Configure()
{
Mapper.CreateMap<TB_Stu_Education, StuEducationDto>()
.ForMember(dest => dest.DegreeName, opt => opt.ResolveUsing<DegreeNameResolver>().FromMember(s => s.DegreeId))
;
}
}
4、注册log4net
从NuGet安装log4net,关键代码如下,添加配置文件“\Config\log4net.config”
            log4net.Config.XmlConfigurator.Configure(
              new System.IO.FileInfo(AppDomain.CurrentDomain.BaseDirectory + "\\Config\\log4net.config")
            );
public class Log4NetLogger : ILogger
{
private static readonly ILog loginfo;
private static readonly ILog logerror;
private static readonly ILog logmonitor;
static Log4NetLogger()
{
//不同类型的日志 存放在 不同 的 目录中
loginfo = LogManager.GetLogger("loginfo");
logerror = LogManager.GetLogger("logerror");
logmonitor = LogManager.GetLogger("logmonitor");
}
public void Info(string message)
{
if (loginfo.IsInfoEnabled)
loginfo.Info(message);
}
public void InfoFormat(string format, params object[] args)
{
if (loginfo.IsInfoEnabled)
loginfo.InfoFormat(format, args);
}
public void Warn(string message)
{
if (loginfo.IsWarnEnabled)
loginfo.Warn(message);
}
public void Error(string message, Exception ex = null)
{
if (logerror.IsErrorEnabled)
{
if (ex != null)
{
logerror.Error(message, ex);
}
else
{
logerror.Error(message);
}
}
}
public void Monitor(string message)
{
if (logmonitor.IsInfoEnabled)
logmonitor.Info(message);
}
}
三、调试API接口(Fiddler)
1、GET 获取
http://api.frozen.com/api/StuEducation/1
返回:{"DegreeName":"本科","Id":1,"StuId":1,"DegreeId":2,"SchoolName":"安大","MajorName":"计算机科学与技术","StartDate":"2008-09-01 00:00:00","EndDate":"2012-06-01 00:00:00","CreateTime":"2015-01-01 00:00:00","LastModifyTime":null}
代码:
        public StuEducationDto Get(int id)
        {
            var dto = _stuEducationAppService.GetDTOById(id);
            return dto;
        }
2、POST 新增

返回
HTTP/1.1 201 Created
代码:
        public HttpResponseMessage Post([FromBody]StuEducationDto dto)
        {
            int result = _stuEducationAppService.CreateByDTO(dto);
            return result > 0 ? Request.CreateResponse(HttpStatusCode.Created) : Request.CreateResponse(HttpStatusCode.InternalServerError);
        }
3、PUT 新增/修改
代码:
        public HttpResponseMessage Put(int id, [FromBody]StuEducationDto dto)
        {
            var result = _stuEducationAppService.CreateOrUpdateByDTO(id, dto);
            return result > 0 ? Request.CreateResponse(HttpStatusCode.OK) : Request.CreateResponse(HttpStatusCode.InternalServerError);
        }
4、Patch 局部更新
代码(使用了dynamic参数):
        public HttpResponseMessage Patch(int id, dynamic dtoUpdate)
        {
            var dto = _stuEducationAppService.GetDTOById(id);
            if (dto == null)
            {
                return Request.CreateResponse(HttpStatusCode.PaymentRequired);
            }
            foreach (JProperty prop in dtoUpdate)
            {
                switch (prop.Name.ToLower())
                {
                    case "degreeid":
                        dto.DegreeId = prop.Value.ToObject<int>();
                        break;
                    case "schoolname":
                        dto.SchoolName = prop.Value.ToObject<string>();
                        break;
                    case "majormame":
                        dto.SchoolName = prop.Value.ToObject<string>();
                        break;
                    case "startdate":
                        dto.StartDate = prop.Value.ToObject<DateTime>();
                        break;
                    case "enddate":
                        dto.EndDate = prop.Value.ToObject<DateTime>();
                        break;
                    default:
                        break;
                }
            }
            var result = _stuEducationAppService.UpdateByDTO(id, dto);
            return result > 0 ? Request.CreateResponse(HttpStatusCode.OK) : Request.CreateResponse(HttpStatusCode.NotFound);
        }
5、Delete 删
代码:
        public HttpResponseMessage Delete(int id)
        {
            var result = _stuEducationAppService.DeleteById(id);
            return result > 0 ? Request.CreateResponse(HttpStatusCode.OK) : Request.CreateResponse(HttpStatusCode.NotFound);
        }
四、数据仓储
由于不打算使用EF,但数据仓储又是DDD一个不可绕开的话题,所以单独写了一个DDD EF Repository的Demo
http://www.cnblogs.com/frozenzhang/p/5390551.html
五、MongoDB数据仓储
已单独开篇,
http://www.cnblogs.com/frozenzhang/p/5442314.html
六、领域事件DomainEvents
感谢仓储大叔的分享,这里只贴出大叔没给出的源码:ActionDelegatedEventHandler<TEvent>类
    public class ActionDelegatedEventHandler<TEvent> : IEventHandler<TEvent>
        where TEvent : IEvent
    {
        private Action<TEvent> func;
        public ActionDelegatedEventHandler(Action<TEvent> func)
        {
            this.func = func;
        }

        public void Handle(TEvent evt)
        {
            func(evt);
        }

    }
调用示例:
static void Main(string[] args)
{
EventBus.Instance.Subscribe(new DeleteStudentHandler_SendEmailToStudent());
EventBus.Instance.Subscribe(new DeleteStudentHandler_SendEmailToStudent());
EventBus.Instance.Subscribe(new ActionDelegatedEventHandler<DeleteStudentEvent>(o => { Thread.Sleep(100); Console.WriteLine("学生Id为{0}", o.StuId); }));
EventBus.Instance.Subscribe(new ActionDelegatedEventHandler<DeleteStudentEvent>(o => { Thread.Sleep(100); Console.WriteLine("学生Id为{0}", o.StuId); }));
var entity = new DeleteStudentEvent { StuId = 1 };
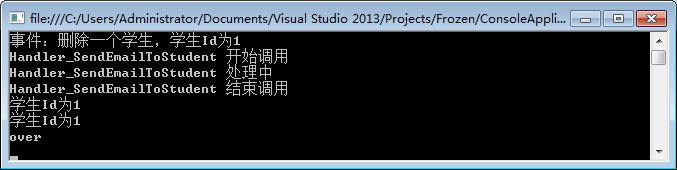
Console.WriteLine("事件:删除一个学生,学生Id为{0}", entity.StuId);
EventBus.Instance.Publish(entity);
Console.WriteLine("over");
Console.ReadKey();
}结果:
七、领域Command
关于Event和Command的解释,http://www.zhihu.com/question/29129068
完整代码请移步
注册
            builder.RegisterType<DefaultCommandBus>().As<ICommandBus>().InstancePerLifetimeScope();

            var domainCommands = Assembly.Load("Frozen.DomainCommands");
            builder.RegisterAssemblyTypes(domainCommands)
                .AsClosedTypesOf(typeof(ICommandHandler<>)).InstancePerLifetimeScope();
            builder.RegisterAssemblyTypes(domainCommands)
                .AsClosedTypesOf(typeof(IValidationHandler<>)).InstancePerLifetimeScope();
Command
    /// <summary>
    /// Command 删除学生
    /// </summary>
    public class DeleteStudentCommand : ICommand
    {
        /// <summary>
        /// 学生Id
        /// </summary>
        public int StuId { get; set; }

    }
Handler
    public class DeleteStudentHandler : ICommandHandler<DeleteStudentCommand>
    {
        private readonly IStuEducationRepo _iStuEducationRepo;

        public DeleteStudentHandler(IStuEducationRepo iStuEducationRepo)
        {
            this._iStuEducationRepo = iStuEducationRepo;
        }

        public ICommandResult Execute(DeleteStudentCommand command)
        {


            return new CommandResult(true);
        }

    }
调用
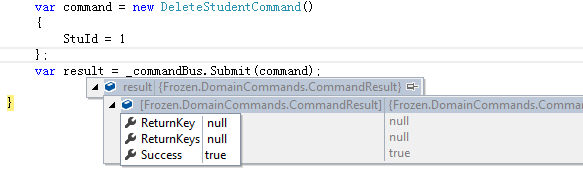
    var command = new DeleteStudentCommand()
      {
      StuId = 1
      };
      var result = _commandBus.Submit(command);
结果:
八、Solr搜索引擎
1、搭建Solr环境(Windows),见另一篇分享http://www.cnblogs.com/frozenzhang/p/5333746.html
2、在browser的Solr管理后台添加Core “Student”
  <!-- general -->
  <field name="StuId"  type="int" indexed="true" stored="true" multiValued="false" required="true"/>
  <field name="Name" type="string" indexed="true" stored="true"/>
  <field name="DegreeIdArr" type="int" indexed="true" stored="true" multiValued="true" />
  <field name="SchoolNameArr" type="string" indexed="true" stored="true" multiValued="true" />
  <field name="MajorCodeArr" type="string" indexed="true" stored="true" multiValued="true" />

<uniqueKey>StuId</uniqueKey> 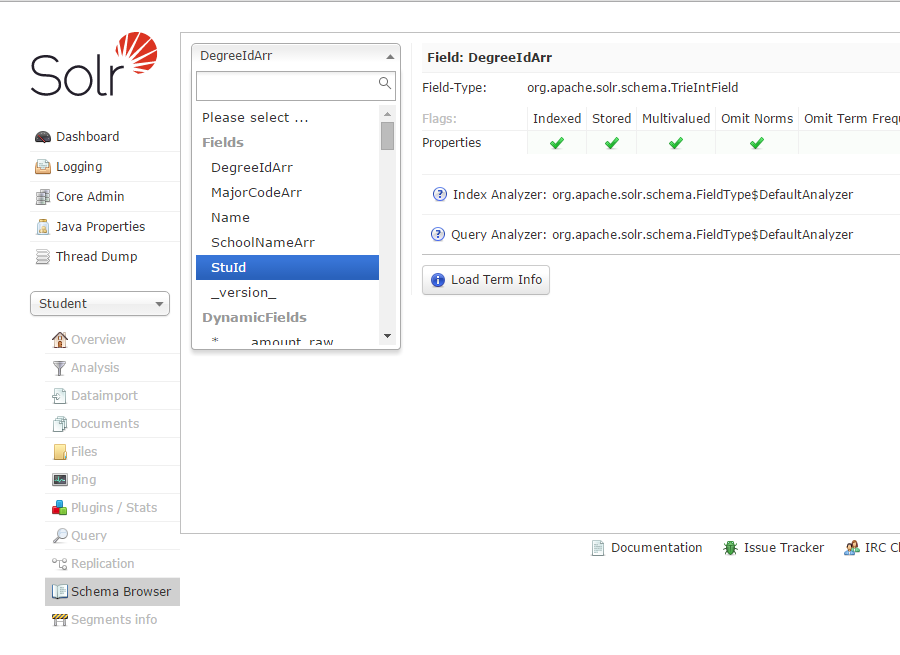
3、从NuGet安装SolrNet
4、项目中新建索引类‘StudentSolrIndex’
    public class StudentSolrIndex
    {
        [SolrUniqueKey("StuId")]
        public int StuId { get; set; }

        [SolrField("Name")]
        public string Name { get; set; }

        [SolrField("DegreeId")]
        public int DegreeId { get; set; }

        public string SchoolNamesStr { get; set; }

        [SolrField("SchoolNameArr")]
        public ICollection<string> SchoolNameArr
        {
            get
            {
                if (string.IsNullOrEmpty(SchoolNamesStr)) { return new string[] { }; }
                return SchoolNamesStr.Split(new[] { ',' }, StringSplitOptions.RemoveEmptyEntries).Distinct().ToList();
            }
        }

        public string MajorCodesStr { get; set; }

        [SolrField("MajorCodeArr")]
        public ICollection<string> MajorCodeArr
        {
            get
            {
                if (string.IsNullOrEmpty(MajorCodesStr)) { return new string[] { }; }
                return MajorCodesStr.Split(new[] { ',' }, StringSplitOptions.RemoveEmptyEntries).Distinct().ToList();
            }
        }

    }
5、.config配置
  <appSettings>
    <add key="StudentSolrServiceUrl" value="http://localhost:8080/solr/Student" />
  </appSettings>
6、同步数据
            SolrNet.Startup.Init<StudentSolrIndex>(ConfigurationManager.AppSettings.Get("StudentSolrServiceUrl"));

            var solrOper = ServiceLocator.Current.GetInstance<ISolrOperations<StudentSolrIndex>>();

            solrOper.Add(new StudentSolrIndex()
            {
                StuId = 1,
                Name = "张冬林",
                DegreeId = 3,
                SchoolNamesStr = "安大,上大",
                MajorCodesStr = "080901,080902"
            });

            solrOper.Commit();
7、这时在solr的admin界面,查询,看见数据,说明数据同步成功了
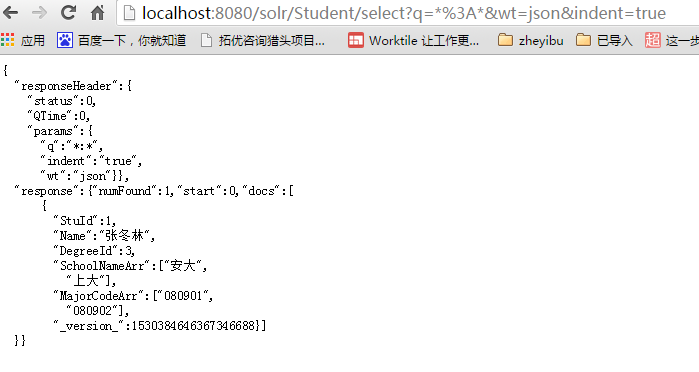
8、查询数据
            SolrNet.Startup.Init<StudentSolrResult>(ConfigurationManager.AppSettings.Get("StudentSolrServiceUrl"));

            var solrQuery = ServiceLocator.Current.GetInstance<ISolrOperations<StudentSolrResult>>();

            ISolrQuery mainQuery = SolrQuery.All;

            QueryOptions options = new QueryOptions()
            {
                FilterQueries = new List<ISolrQuery>().ToArray(),
                OrderBy = new SortOrder[] {
                    SortOrder.Parse("score desc")
                },
                Start = 0,
                Rows = 20,
            };
            var results = solrQuery.Query(mainQuery, options);
结果截图:

九、Redis
1、Windows下Redis的环境安装,感谢园子里一位博友的分享
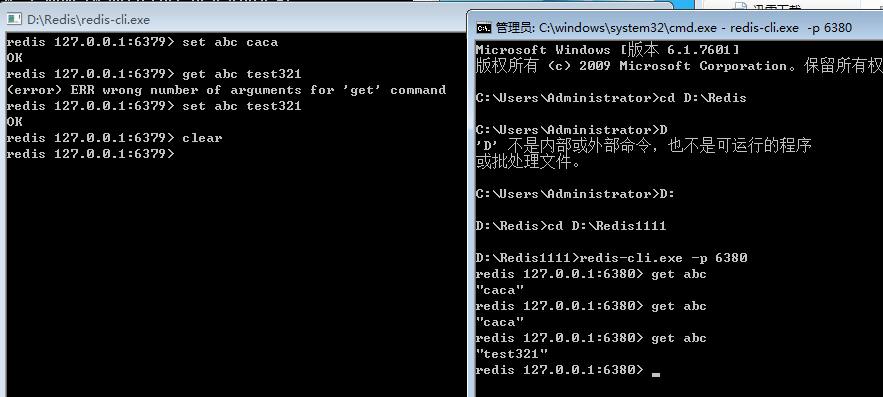
2、配置主从服务器(从服务器作为只读)
Redis的默认服务端口是6379,
所以这里只修改从服务器的redis.config里的配置
port 6380
bind 127.0.0.1
slaveof 127.0.0.1 6379
6379是主服务器,6380作为从服务器
3、Redis作为缓存服务器
已单独开了一篇,http://www.cnblogs.com/frozenzhang/p/5439940.html
十、SignalR(+Redis)
1、SignalR在线聊天室
已单独开了一篇,http://www.cnblogs.com/frozenzhang/p/5406773.html
十一、Memcached
 1   <configSections>
 2     <sectionGroup name="enyim.com">
 3       <section name="memcached" type="Enyim.Caching.Configuration.MemcachedClientSection, Enyim.Caching" />
 4     </sectionGroup>
 5   </configSections>
 6   <enyim.com>
 7     <memcached>
 8       <servers>
 9         <!-- put your own server(s) here-->
10         <add address="127.0.0.1" port="11211" />
11       </servers>
12       <socketPool minPoolSize="10" maxPoolSize="100" connectionTimeout="00:00:10" deadTimeout="00:02:00" />
13     </memcached>
14   </enyim.com>
 1 using Enyim.Caching;
 2 using Enyim.Caching.Memcached;
 3 using Frozen.Framework.Cache;
 4 using System;
 5 using System.Collections.Generic;
 6
 7 namespace Froen.Memcached.Cached
 8 {
 9     public class MemcachedCache : ICache
10     {
11         private const string REGION_NAME = "$#MemcachedCache#$";
12         private const int _DefaultCacheTime = 30;
13         private readonly static object s_lock = new object();
14
15         private static readonly MemcachedClient client = new MemcachedClient();
16
17         public IEnumerable<KeyValuePair<string, object>> Entries
18         {
19             get { throw new NotImplementedException(); }
20         }
21
22         public T Get<T>(string key, Func<T> baseMethod)
23         {
24             return Get(key, baseMethod, _DefaultCacheTime);
25         }
26
27         public T Get<T>(string key, Func<T> baseMethod, int cacheTime)
28         {
29             key = BuildKey(key);
30
31             if (client.Get(key) != null)
32             {
33                 return client.Get<T>(key);
34             }
35             else
36             {
37                 lock (s_lock)
38                 {
39                     if (client.Get(key) == null)
40                     {
41                         var value = baseMethod();
42                         if (value != null) //请区别null与String.Empty
43                         {
44                             client.Store(StoreMode.Set, key, value, TimeSpan.FromMinutes(cacheTime));
45                         }
46                         return value;
47                     }
48                     return client.Get<T>(key);
49                 }
50             }
51         }
52
53         public bool Contains(string key)
54         {
55             return client.Get(BuildKey(key)) != null;
56         }
57
58         public void Remove(string key)
59         {
60             client.Remove(BuildKey(key));
61         }
62
63         private string BuildKey(string key)
64         {
65             return string.IsNullOrEmpty(key) ? null : REGION_NAME + key;
66         }
67
68     }
69 }
十二、为API自动生成帮助文档
1、安装Microsoft.AspNet.WebApi.HelpPage
2、修改Areas/HelpPag/App_Start/HelpPageConfig的Register方法
配置xml文件路径:"~/App_Data"
1             // Uncomment the following to use the documentation from XML documentation file.
2             config.SetDocumentationProvider(new XmlDocumentationProvider(HttpContext.Current.Server.MapPath("~/App_Data")));
这时访问/Help应该会报异常

3、修改Areas/HelpPag/XmlDocumentationProvider的构造函数
 1         public XmlDocumentationProvider(string documentPath)
 2         {
 3             //if (documentPath == null)
 4             //{
 5             //    throw new ArgumentNullException("documentPath");
 6             //}
 7             //XPathDocument xpath = new XPathDocument(documentPath);
 8             //_documentNavigator = xpath.CreateNavigator();
 9
10             XDocument finalDoc = null;
11             foreach (string file in Directory.GetFiles(documentPath, "Frozen.*.xml"))
12             {
13                 using (var fileStream = File.OpenRead(file))
14                 {
15                     if (finalDoc == null)
16                     {
17                         finalDoc = XDocument.Load(fileStream);
18                     }
19                     else
20                     {
21                         XDocument xdocAdditional = XDocument.Load(fileStream);
22
23                         finalDoc.Root.XPathSelectElement("/doc/members")
24                             .Add(xdocAdditional.Root.XPathSelectElement("/doc/members").Elements());
25                     }
26                 }
27             }
28
29             // Supply the navigator that rest of the XmlDocumentationProvider code looks for
30             _documentNavigator = finalDoc.CreateNavigator();
31         }
4、通过Web页查看接口
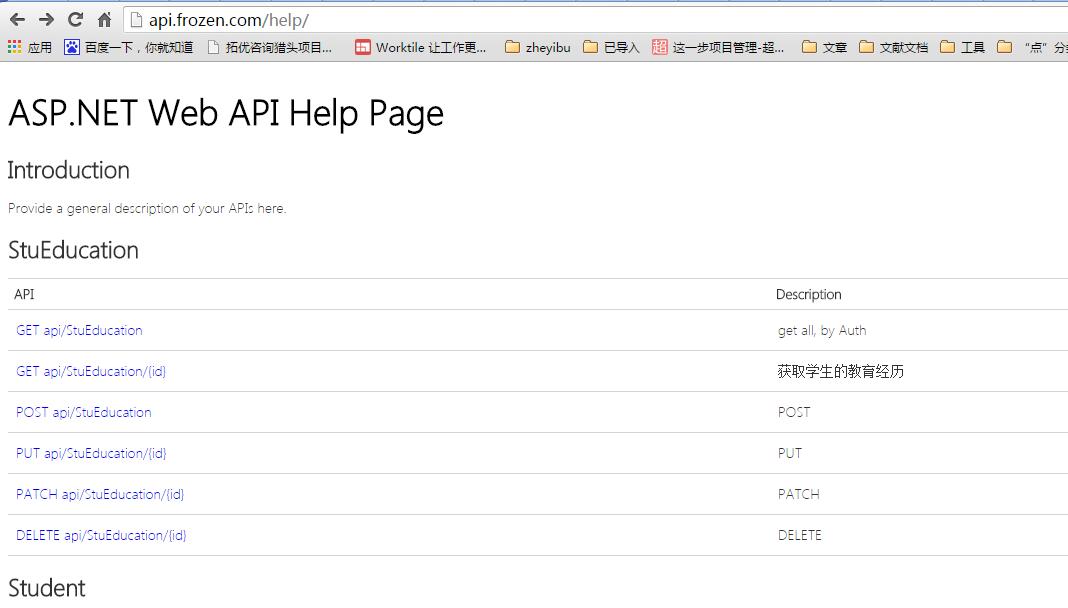
强烈推荐阅读园友的分享:如何使 WebAPI 自动生成漂亮又实用在线API文档-Swashbuckle。界面不仅颜值高,还可以代替Fiddler来调试api接口