一、下载:
Spring.net的官方网址:http://www.springframework.net/
Spring.net的最新版本:Spring.NET-1.2.0
Spring.net的更新日期:2008-11-10
Spring.net的下载地址:http://dist.springframework.org/release/NET/Spring.NET-1.2.0.exe
单独下载API文档:http://dist.springframework.org/release/NET/Spring.NET-1.2.0-net-2.0-api.zip
单独下载参考手册:http://www.springframework.net/docs/1.2.0/reference/pdf/spring-net-reference.pdf
二、安装
下载后直接执行Spring.NET-1.2.0.exe的文件,一步一步照着提示安装就行了。
安装完成后,请找到安装目录下的\doc\schema\目录,复制*.xsd到Visual Studio的schema目录下:
VS2005:C:\Program Files\Microsoft Visual Studio 8\Xml\Schemas
VS2008:C:\Program Files\Microsoft Visual Studio 9.0\Xml\Schemas
这样,就可以在配置xml的时候使用Visual Studio进行代码提示了。
三、HelloWorld
不能免俗,从HelloWorld开始吧!
1.开发环境
Windows XP 英文版
Visual Studio 2008(SP1) 英文版
为了便于google,我的开发环境是英文版的。

2.新建一个控制台(Console Application)项目,名称HelloWorld。
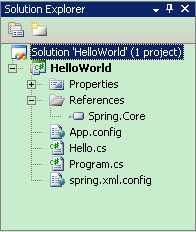
3. 解决方案资源管理器(Solution Explorer)
4.主要文件
Spring.Core.dll:这个是Spring.net的核心库文件,要先引用进来。
添加引用(Add Reference),找到Spring.net的安装目录下的bin\net\2.0\release\Spring.Core.dll文件,添加进来。
context.GetObject方法会加载哪个配置文件。
 App.config
<?xml version="1.0" encoding="utf-8" ?>
<configuration>
<configSections>
<sectionGroup name="spring">
<section name="context" type="Spring.Context.Support.ContextHandler, Spring.Core"/>
</sectionGroup>
</configSections>
<spring>
<context>
<resource uri="spring.xml.config"/>
</context>
</spring>
</configuration>Hello.cs
 class Hello
{
 private string helloword;
public string HelloWord
 {
{
get { return this.helloword; }
set { this.helloword = value; }
 }
}
 }
} Program.cs
class Program
{
static void Main(string[] args)
{
IApplicationContext context = ContextRegistry.GetContext();
Hello hello = (Hello)context.GetObject("hello");
System.Console.Out.WriteLine(hello.HelloWord);
System.Console.In.Read();
}
} 主程序中调用context.GetObject并传入"hello"参数,就会在这里查找相应的类,以其来创建实例,并根据配置给此实例的属性HelloWord赋值。
spring.xml.config
<?xml version="1.0" encoding="utf-8" ?>
<objects xmlns="http://www.springframework.net">
<object id="hello" type="HelloWorld.Hello">
<property name="HelloWord" value="Hello!Welcome to Spring.Net Word!"/>
</object>
</objects>
好了,编写完毕,按<F5>运行,画面如下:
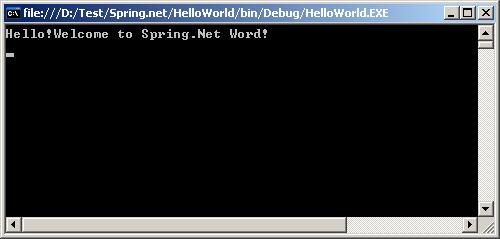
OK!演示完毕。
…………
等等,先别走,难道没发觉得有什么不对吗?
对了,尽管例子已经很简单了,但是如果不用Spring.net直接编程不是更简单吗?在主程序中直接书写如下:
namespace HelloWorld
{
class Program
{
static void Main(string[] args)
{
//IApplicationContext context = ContextRegistry.GetContext();
//Hello hello = (Hello)context.GetObject("hello");
Hello hello = new Hello();
hello.HelloWord = "Hello!Welcome to Spring.Net World!";
System.Console.Out.WriteLine(hello.HelloWord);
System.Console.In.Read();
}
}
}这样还不用什么配置文件,搞这么麻烦干什么?
呵呵,这就是Spring.net的核心思想Ioc,依赖文件中的配置来决定程序的执行走向。
当然,我们这个HelloWorld还是要在程序中有这么一行:
Hello hello = (Hello)context.GetObject("hello");
这里对Hello类产生了耦合,在实际项目中可以通过接口或泛型的方式来解耦它,我将在后续系列中继续抛砖。^O^!
今天太晚了,费话少说,直接上源码

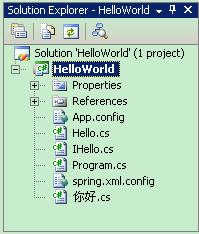
1.解决方案资源管理器(Solution Explorer)
2.主要文件
这里仅对上一篇中代码有所变动的地方进行讲解。
IHello.cs:新添加了一个接口给主程序调用,这样主程序就和Hello类解耦了,而此接口具体用什么类来实现,要通过下面的spring.xml.config配置文件来配置。
namespace HelloWorld
{
interface IHello
{
void printf(string name);
}
}
spring.xml.config:配置如果传递hello1的参数,会构造Hello类的实例;如果传递hello2的参数,会构造“你好”类的实例。
<?xml version="1.0" encoding="utf-8" ?>
<objects xmlns="http://www.springframework.net">
<object id="hello1" type="HelloWorld.Hello">
</object>
<object id="hello2" type="HelloWorld.你好">
</object>
</objects>
Hello.cs:实现IHello接口的一个类,这个类用英语将Helloworld显示到控制台。
namespace HelloWorld
{
class Hello : IHello
{
#region IHello Members
public void printf(string name)
{
Console.WriteLine("Hello " + name + "!Welcome to Spring.Net world!");
}
#endregion
}
}
你好.cs:实现IHello接口的一个类,这个类用中文将Helloworld显示到控制台。
namespace HelloWorld
{
class 你好:IHello
{
#region IHello Members
public void printf(string name)
{
Console.WriteLine(name + "你好!欢迎来到Spring.Net的世界!");
}
#endregion
}
}
Program.cs:主程序,在控制台上分别用英语和中文显示Helloworld。
using Spring.Context;
using Spring.Context.Support;
namespace HelloWorld
{
class Program
{
static void Main(string[] args)
{
IApplicationContext context = ContextRegistry.GetContext();
IHello hello1 = (IHello)context.GetObject("hello1");
hello1.printf("yaoming");
IHello hello2 = (IHello)context.GetObject("hello2");
hello2.printf("姚明");
System.Console.In.Read();
}
}
}
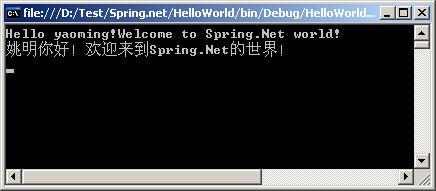
OK!让我们运行看看结果:
怎么样,简单吧!好的,别急,最后按例放上源码:
演示Spring.net用接口来实现HelloWorld的实例
http://www.cnblogs.com/zbz/archive/2008/11/04/1324652.html
http://www.cnblogs.com/zbz/archive/2008/11/11/1331703.html